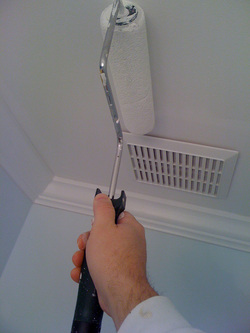
 You might've heard that painting is the easiest most cost effective way to update your home. But is it as simple as slapping a coat of paint on the walls? There's a lot of tricks that ensure a gorgeous new paint job. Here's an inside look at what really goes into painting a room.
Primer/Prep Before the paint goes on the walls, work needs to be done to them. Everything gets cleaned thoroughly in order to remove dirt and anything that would keep the paint from adhering to the surface. After it is dry, any holes or joints must be caulked or patched using only premium grade materials. Then the appropriate primer is applied to the walls. This is tinted for better coverage of the final coat. It is used to increase adhesion, prevent stains, develop sheen and retain a uniform appearance. Once the wall is finished we tape off and paint any molding or trim. If needed the walls are sanded. Sanding levels out any patches, flattens ridges from nail holes, and removes burrs and rough spots in your trim. Paint It's time to apply the first coat of paint of your choice. The paint is mixed together to ensure consistency, a process called boxing. We paint one wall at a time, and allow the first coat to dry. The brushed and rolled paint blend together better this way. Any installation of crown molding or chair rail is done before final topcoats to allow for caulk and putty to be applied and dry. Once the wall is dry and these steps are completed, we apply a second coat for best coverage. The number of coats applied sometimes depends on the color. Ultradeep tones often require tinted primer and/or additional topcoats. For example red contains a lot of pigment and requires extra coats. Review The final inspection of the project happens next and then we make any necessary final touch-ups. A poorly executed paint job is easy to point out. It takes skill, patience and technique to get those walls looking their best. Believe us- with 17 years of experience, we know it's true!
0 Comments
 Accent walls have become very popular in the recent years.
The picture shown here is an accent wall we painted in a bedroom. Notice that the accent wall has the bed against it. You want to paint the accent wall one that has most purpose for this, like a focal point. In this case that is the bed. Some examples might be if your large furniture is against it, like the bed or entertainment center or if the wall is odd shaped. Here's 5 reasons to try an accent wall in your home: 1. It gives definition to your home. Walls all the same color? Looks so flat. If you have interesting architecture this is a really nice way to bring it to life. Don't go overboard. Just one on each floor would do the trick. Think around your fireplace, or on a divider wall. Here's a visual for you. 2. They bring color into your home without compromising the light that any neutral shade provides. See what I mean here. 3. They save you from decorating. No more holes in the walls! An accent wall is a decoration in itself and you don't want to overdo it with too many pictures. Accent walls can even have decorations painted on them, or stripes, or anything really! Blik is a company that sells wall decals, so it doesn't have to be permanent! How cool is that? Click here for an example of a decorative accent wall. 4. They show less dirt/wear. On that light/white wall believe me you're going to see it all. Choosing a darker shade, or a pattern can make marks and wear less noticeable. Check out this nice accent wall in a laundry room, a space that often sees a lot of use! 5. Helps highlight things in your home. The eye is drawn to colors, and if you own anything that you'd like to draw people's attention to this is the perfect way to do it. This example is cool because the wall almost looks like the picture frame. See it here. Because dark colors can make a room look smaller consider doing these in larger rooms, on the wall against the staircase, in rooms with large windows, next to sliding doors, or choose a slightly lighter color for the bedroom depending on the size and window coverage.  We all know that the 4th of July is the day we remember the signing of the Declaration of Independence, commemorating our independence from England. For us at Chris Gamber Painting we feel that living in a country filled with many great opportunities is a privilege.
We are fortunate to help homeowners and businesses show the pride they take in their homes and shops by maintaining them. Thanks to all the clients we've worked with over the years and we look forward to continue this American tradition of keeping our properties in top shape. But enough of what we think, we'd like to know what 4th of July means to YOU! You can reply to this blog or post on our Facebook wall. It's a time to celebrate, so here's some fun ideas to have a great holiday weekend: 1. Decorate your yard with some patriotic stars. Click here to check it out! There are other fun ideas to make your backyard the best place to be this July! 2. Make red, white and blue drinks for your party- everyone can enjoy this non-alcoholic idea. Click here to see how it's done. 3. Decorate your door with this awesome festive wreath. DIY directions can be found here. It's pretty simple and you can even add your own creative touches. Have fun with it! 4. We can't forget the food. Click here for 30 mouth watering side dishes you can make this holiday. From potato salad to red, white and blue deviled eggs, no one will go hungry! 5. Finally, here's fun patriotic crafts for the kids to make this holiday. They can make these to decorate for the party, or have the crafts available for them to keep busy during the festivities! This link will show you the many options! Have a happy and safe 4th of July!  We’re scheduled to paint the interior of your home, or you’re considering our services. That’s an exciting step to getting your home in tiptop shape.
Did you know that the time and care it takes to prepare the painting surface is an important step to the painting process? There are some things you can do to help make this process easier and quicker which we’ll review and also let you know our process for painting projects. Here’s what to do before we get there: · We ask that you remove small furnishings, pictures, fragile objects and window treatments from the room. · For larger furniture and things that can’t be removed place all items in the center of the room. Then sit back and relax, we’ll take it from here. Curious what the process is? So that you have an idea of how we handle our projects, here’s a general overview: We remove outlet covers and screws from the walls, this helps to avoid the unattractive appearance of uneven cut-in lines and paint on your outlet covers. Next we lay drop cloths throughout the room. Ours are heavy-duty butyl drops, because these are best at containing spills and splatters. Plastic or newspaper isn’t enough to protect the surrounding areas, and will shift around which is why we don’t use them. If the area we’re painting is dustier than normal, we remove dust and dirt with a shop-vac before using a cleaning solution on the walls. This is done because paint adheres best to a clean surface. We use a solution of TSP (Tri-sodium phosphate) and water because it’s great for cleaning off grease and other stains. We spackle any nail holes, cracks, or other imperfections on the surface. This is done by firmly applying the spackle with a putty knife. We allow the product to dry thoroughly before going further. After the spackle dries we sand the filled areas, to create a smooth, uniform surface. Trim and other glossy areas that are being painted are also sanded because the new coat of paint will adhere better by roughing up the surface. We look to see if there are any joints or seams on the walls that need caulk. Often this is where trim pieces meet the wall and create a small gap. Then we wait for the caulk to dry. Lastly, we spot-prime discolored and spackled spots, which allows for the best adhesion in the “problem” areas. All these steps have been carefully planned out to ensure that your paint job will lay down more evenly, adhere better, and have a longer life. It might seem like a long process, but these steps are sure to pay off in the final results. The job of painting is secondary to a well-prepped surface. Now that you know our processes we look forward to helping you with your home improvement project! 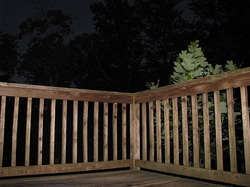 Does the outside of your home desperately need a new coat of paint? Or maybe it's your deck that hasn't been maintained like it should.
Whatever situation applies to you, there are things to keep in mind when it comes to getting the job done properly. As with many things, a little prep and money spent in the beginning will save you in the long run. Here's some pointers we've developed after 17 years in business: Weather Whenever you're dealing with an outside project, you're at the mercy of mother nature. This is where the planning comes in. It's best to paint when the temperature is between 65 and 85 degrees. Now is a good time to schedule, since were already seeing some 65 degree days! Removal / Cleaning In order to get a nice finish, you have to start with smooth wood that isn't cracked or flaking. Removal is an important step, but be careful not to gouge the surface. Remove as much loose and peeling paint by scraping, wirebrush or power-washing the surface. Be sure to feather-sand rough edges smooth until they blend with the bare surface. If there is paint on your deck, be careful before removing it because it could contain lead which is a serious health hazard. This would apply to paint before 1978. If you're not sure how old the paint is, there are ways to test for lead. This is a situation where it is important to have the work done by professionals. The existing paint might look like it's in good condition, but could be contaminated with powdered paint. Using a power washer is the best option in that situation. There might also be mildew which needs special removal that power washing won't do. Sealing One of the most common causes of paint failure is moisture in the wood. This can be prevented by sealing the areas. Cracks or open joints, where water may enter should be caulked with a high-quality, paintable acrylic caulk. Patch all nail holes and imperfections with a wood filler or putty and sand smooth. Caulk should be applied after priming. Primer / Painting Primer helps new paint adhere to bare wood. Paint often has recommended primer to compliment it. Top quality paint should be used with exterior jobs because of all the weather it will face. For this reason two coats of paint are best. Brushes should be clean and top quality, and there are different brushes that work best with certain types of paint. The tool used is important to a successful outcome. Exterior painting requires a thorough knowledge of best products, practices and proper tools. Improperly prepared surfaces can result in reduced coating integrity and service life. Up to 80% of all coatings failures can be directly attributed to inadequate surface preparation, which affects coating adhesion. In plain terms, if not done properly it can cause more headaches than enjoyment! Just remember, you can always give us a call!  We've all heard that the best time to sell your home is in spring and summer. But do you know what needs to be done to get the most for your home and sell it before the snow lays again?
You want to make sure your home is nice the best condition possible. Just imagine, spending all that money for a home, and doing the work of packing, moving, unpacking only to have to work more to fix things in it? Not appealing to most people. By investing in home improvement, you could get thousands more for your home. Here's what to consider when selling: Paint! The first thing we can't help but quote our saying for, "It's amazing...what a coat of paint will do!" There's something about clean, bright walls that are inviting. Stick with neutral colors to appeal to the majority. That lime green wall might be enough to have your buyers look on. After the house is painted, leave everything off the walls to avoid any scuffs and marks. (If you do need to hang anything try sewing pins, they barely leave a mark.) Kitchen! Consider new counter tops and cabinets. As with any remodeling, it can get pricey...consider just replacing the front of the cabinet. Carpeting! Arguably one of the most noticeable things about a house. Take a good look at yours...if it's lifting, torn, worn down (you get the idea) you should consider replacing it. You might be able to get away with a good carpet cleaning if it's just normal wear. Consider using nice rugs if the carpet needs some spice. Bathroom! A very important part of the home, but to stay in line with your budget you can update the fixtures, and tapware. Re-grouting is another option to make the bathroom look new again. Outside! Have nice, neat landscaping, and treat any wood, like a deck, appropriately. This is the first impression potential buyers get, after all. Pressure wash if needed. Make sure to de-clutter, and thoroughly clean your house when it's on the market- every little bit makes a difference. Let the sun shine- in your house. Make sure your curtains are nice and clean as well. We mentioned a budget- set one and look at what needs the most attention in your home. Work on improving those things first, and see how you can spice up what can't be fixed or replaced. Be sure to check out our Pinterest page for more great ideas. 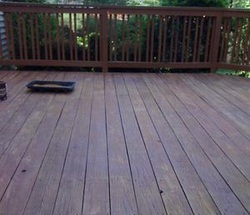 There’s only 6 more weeks of winter, and if you’re not looking forward to spring by now you are the minority! The sun, green grass, and flower buds are only too welcoming after this rough winter.
If you haven’t begun making a list of all the wonderful jobs you’ll need to do once the weather warms up now is the time to start thinking about it. As a homeowner, the jobs never cease; if you’re not repairing the leaking roof from all this snow, you’re sealing the driveway, putting fertilizer on the lawn, and cleaning up after the dog. Have you stopped to think about where you’ll relax when all of this is done and spend time outside? Think about where you like to relax when the weather is warm and sunny? Most people enjoy reading a book, or eating a savory steak on their deck. But wait a minute - that needs to be maintained too! Maybe this is already on your to-do list, or maybe you only just notice it while trying to enjoy your day off. Either way, in order to keep enjoying it for many years it’ll need to be maintained. Here are some helpful hints when approaching your deck maintenance. 1. The age of your deck matters! This helps determine what type of product to use to seal it. 2. Once you colorize your deck, you can’t change it. Take time to think about what matches best with the surroundings. Keep in mind that it takes more time to colorize than just sealing. 3. Cleaning your deck regularly is important to the quality. When the deck is clean the sealer or stain will take to the wood better, making the finished product look nicer. Just like regularly washing your car, your deck will maintain a new appearance for longer. 4. Which direction your deck faces makes a difference. If the deck is in an area where it gets a lot of sun exposure it can wear out faster. To avoid this, stains should have UV inhibitors. 5. Deck maintenance depends on wood type. Most decks are made of pressure treated wood which hold up a little better in the elements than say, cedar wood. Even so, periodic maintenance is still required to keep that new look for years. We don’t have control over the weather - this winter is the perfect example. We do have control over protecting our valued property from damage by it! Don’t let the elements wreck your day off. Start planning now so you can enjoy your deck when the weather is nice! |
AuthorJessica Walsh is a graduate of Penn State University with a minor in English. While in college she contributed to the literary journal, newspaper and yearbook. She was a journalist for Voices and BCTV.org. She continues to write her own blog as well as stories and articles. Archives
January 2018
CategoriesBlog writer Jessica Walsh is a graduate of Penn State University with a minor in English. While in college she contributed to the literary journal, newspaper and yearbook. She was a journalist for Voices and BCTV.org. She continues to write her own blog as well as stories and articles.
|
 RSS Feed